

VMware software are one of the most used software for Virtualizations. And we continually introduce new articles on virtualization and virtual machine software. And as always, today’s guide is on how to install VMware tools on macOS Big Sur.
There are a lot of people who use Mac operating systems as a guest OS on Windows, or any other non-mac machines. And therefore, they often get some minor or sometimes bigger problems with Virtual machines.
Sometimes, the resolution creates problems, and sometimes, drag-and-drop or copy-paste functions don’t work.
Suppose you’ve installed macOS Big Sur on VMware Workstation, or any other VMware software. Then you need to install an additional tool called VMware tool.
This tool is specifically for systems that show unexpected and unusual behavior while using the guest operating systems on VMware products. Its job is to find all the faulty functions and fix all the correctable issues without any problems.
Moreover, if you don’t confront any issues with your macOS Big Sur on VMware. Then again we recommend you install the VMware tools on macOS Big Sur in order to avoid any future errors.
These tools are available already with your Virtual machine software. And these tools are made available while you install the Virtual machine.
There are some easy steps, through which you can install VMware tools on macOS Big Sur. So, without taking much more time, let’s get straight onto the steps.
Install VMware tools on macOS Big Sur on Windows 10:
Before going towards installation you should know which components are included in VMware tools. There are basically four components namely
- VMware Tools service
- VMware user process
- VMware device drivers
- VMware Tools control panel
Furthermore, the installation process may differ depending on your guest operating system, and host operating systems.
In this guide, particularly our guest operating system is macOS Big Sur. And the VMWare software is installed on Windows 10. Which means that the host operating system is the Windows operating system.
So, if you’re trying to follow this guide for any other guest operating system other than the Mac operating system. You might get some errors, or the process might be a little bit different. So, it’s better to always find relevant guides.
Moreover, the files are available in three formats, ISO format, OSP format, and OVT format. And there we’re going to use the ISO format of the VMWare tools.
So, the first thing that we need to do is to start up the guest operating system on VMWare.
- From the home interface of the macOS Big Sur, right-click and you’ll see an option for Install VMware tools. This should open a new window.
- In the small window, there are two options. One is for the installation of the VMware tools and the other is for uninstallation.
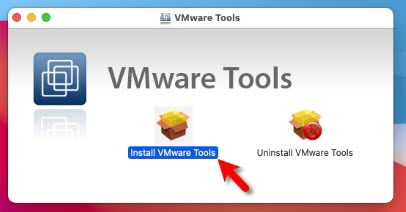
- Click on the Install option. In the new window, you’ll be guided along with installation.
- During installation I recommend reading about each step, so you don’t face any issues. Moreover, move over the next steps one by one. Until the installation is successful sign doesn’t appear.
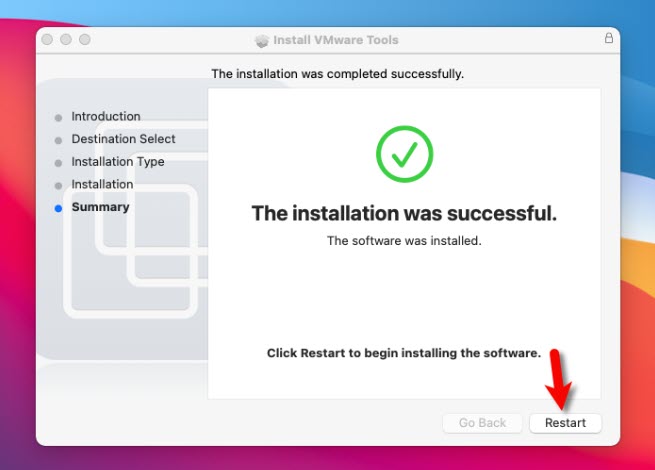
- And finally, from the down button click on the Restart button. This will restart the system with all the changes.


If prior to installation there were some options that were missing. Or some options, that didn’t work. Hopefully now those all problems should have been resolved. And everything should be working fine.
But sometimes it happens, that even installing the VMware tools doesn’t fix these issues. In that case, we recommend reinstalling the VMware tools once.
Because its normal behavior of the VMWare with the guest operating system.
Or as a second option, you can download another ISO file of the VMware tools on the system and install that.
Below, I am going to share a link to the ISO file of the VMware tools that I have prepared for my readers along with the step-by-step guide, on how to do that particularly.
Install VMware tools on macOS Big Sur with manual file:
Firstly, you need to have an ISO file of the VMware tools ready. If not, you can download the file from the below link which is stored in MediaFire.
- Download VMware tools (MediaFire).
During downloading the file. I recommend you remember the location of the file.
- Restart the Virtual machine. Open the macOS Big Sur operating system.
- Then open the Virtual Machine Settings > CD/DVD (SATA) > Use ISO image file > Browse > select the VMware Tools you downloaded from the link above and click Open.
- Furthermore, remember that both boxes are checked below the Device Status option.

- Then again follow the same steps that we presented above. Just right-click on the macOS Big Sur. Among all the options, you can see the Install VMware tools option and follow all the steps shown above.

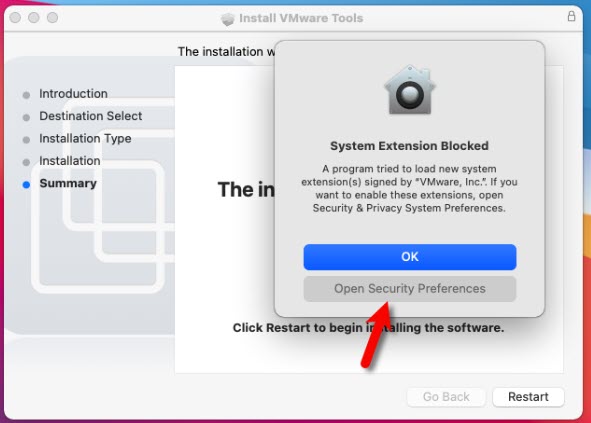
During the installation of VMware tools, which you downloaded from our link might show like blocking the installation. You can unblock them from the system preferences page. You can open the window, and check the boxes including one for VMware.

Conclusion:
Well, this is how you can install VMware tools on macOS Big Sur on Windows 10. Most of the time the VMware tools work on the first attempt. But if that doesn’t, you should reinstall it a few times. And mostly the reinstallation solves the problem.
If you get any sort of error during the installation. You can get to us anytime.
Or if you get stuck at any step. You can also ask through the comment. I will try to get in touch ASAP.


4 comments