With the advancements in technology, it is becoming easier to find better solutions for our tech problems. Today in this post we’re going to show you how to create Windows 10 Bootable USB on macOS Monterey.
As tech is changing rapidly, new things come into the market too. For example, Prior to macOS Big Sur, you can use the Bootcamp app to create Windows 10 Bootable USB. But after the new versions of the Mac operating systems, you can’t use Bootcamp for the creation of bootable USB installers.


But the good news is that there are still many ways to for this purpose.
Below we’re going to talk about some of the most popular and easy ways to create Windows 10 Bootable USB on Mac, and which one should you use and why?
So, without taking much time, let’s get straight to it!
Table of Contents
Create Windows 10 bootable USB on macOS Monterey:
So, the BootCamp option is out now. And we need to find other ways to create bootable USB installers. Apart from Bootcamp, there are two popular methods that generally we use.
Firstly, we can use third-party software that helps us to create Bootable USB installers using the ISO files.
When it comes to these software there is countless free and paid software available in the market we can use for this purpose.
What we are going to do then?
Well, we’re going to use one of the most trusted software out there which we’ve been using for the last few years, and which supports both Windows operating systems and Mac operating systems.
I am not disclosing its name here. After this when we come to the step-by-step process, I am going to name that.
Furthermore, the second option is the Terminal. Yes, you can create Windows 10 bootable USB installer on macOS Monterey using the terminal too.
This method also works perfectly fine, and you can need to install any additional software too.
But the biggest issue with the terminal is that most people are not tech-savvy. And the name terminal brings something that is too technical and hard to use by everyone.
And if you’ve not used a terminal before, I can feel you.
But honestly, the terminal is way too fun to use, because it is one of the shortest methods to execute our daily tasks.
Anyways, we won’t discuss the terminal method below. Because the Software we’re going to use already works perfectly fine, there is no need to create an additional headache for ourselves.
But for extra information, it is better to know that with the help of a terminal too, you can create bootable USB Installers, although it is pretty hard for some people.
So, make sure everything is ready beside you to start.
Download Windows 10 ISO file:
As we already said that the software that we’re going to use needs the ISO file of the operating system. And the software uses that ISO file and changes that to a Bootable USB installer.
We’ve already made an ISO file for Windows 10, which you can download for free. And then we’ll be using that for further process.
You can download the Windows 10 ISO file from the below link.
Windows 10 ISO file for Virtual machines. (Free from techvatan)
Moreover, you can also download the latest version of the Windows 10 ISO file from the official Microsoft website.
Once you download the ISO file. We can move towards our next and final step.
Use Software to create Windows Bootable USB:
Now, coming to the software name. As already said there is multiple software available in the market, that you could use, but we’re going to use the UUByte software, which is a free and easy tool to create bootable USB installers on Mac and Windows operating systems.
This is not a promotional line. But I have been using these for a little more time without any problem. Therefore, I also suggest my readers check the software once.
Firstly if you have the software installed. Then you’re ready to move forward. If not you can download the UUByte from its official website for free. Once you download and install the software. You’re good to go to the next step.
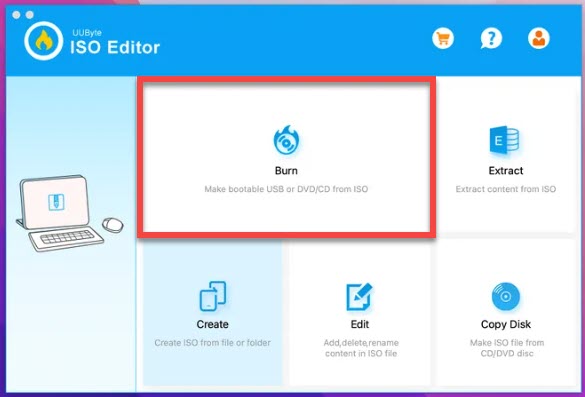
- Start the UUByte app on your computer.
- On the first interface, you should be able to see multiple options. For the task, we need this software we need to choose the make bootable USB from ISO option. Select the option and move on.
- Next, where do you want to create the bootable file? Well, the CD option is pretty old now, therefore, we’ll choose the USB option. Before this make sure to connect a blank USB to your computer. Moreover, also choose UEFI or MBR boot method as per your ISO file.
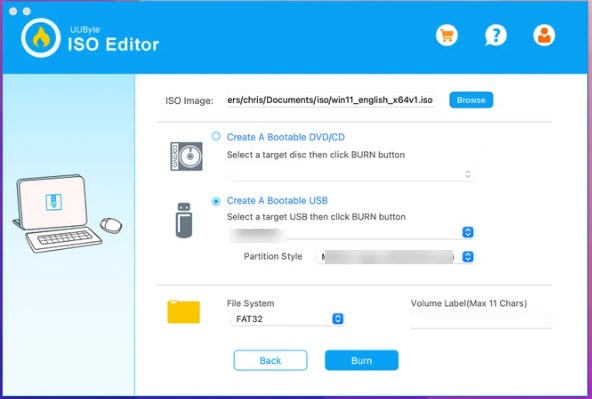
- finally, click on the Burn button. This will start burning the ISO file into the USB attached to the computer. This process usually takes not more than 15 minutes.


Once the process completes. You get a success notification. And here we successfully created Windows 10 Bootable USB on macOS Monterey without Bootcamp.
Wrapping Up:
This is how you can execute these easy step-by-step guides and create Bootable USB on Mac operating systems. This method doesn’t work only on macOS Monterey. Anyone can use this software on almost any Mac operating system whether that is Big Sur, Venture, or any other one.
Moreover, if you’ve any questions, or facing any difficulty during the process. Feel free to comment regarding that! So, that we could look onto that later.

