Do you have Virtualbox on your system and you installed macOS Mojave 10.14 on Virtualbox on Windows although the first macOS Mojave beta version has several errors due to that you are looking to Apple to release the new update of macOS Mojave to fix the bugs. Therefore, Apple released a different version of macOS Mojave and the recent version is 10.14.6, it means you can upgrade macOS Mojave on Virtualbox to the latest version. Hands down, updating macOS Mojave to the latest version has tons of advantages and there will be many new updates, in this case, check the article on How to Update macOS Mojave to the latest version of Virtualbox.
However, Apple is the greatest company that releasing various products per year for its users, Apple announced macOS Mojave on WWDC 2018 and they included major features such as Dark Mode, Dynamic Wallpaper, Desktop Stacks, iOS apps on Mac, Group FaceTime, and many other handy features are added on macOS Mojave. So far, macOS Mojave is in high demand and tons of users prefer macOS Mojave and they are installing macOS Mojave on Virtual Machines, MacBook, Hackintosh, Mac Mini, etc.
Although, installing Mac OS on virtual machines is the best way to test any new release operating system to get its experience and test the features. however, you have the two best virtualization software like Virtualbox and Vmware, this two software is the best and it allows users to test multiple operating systems on a single host computer. it means you can run more than one operating system on your main PC.
If you have installed macOS Mojave on Virtualbox then go to the Apple logo and go to about this Mac, now check the macOS Mojave version. as the latest version of macOS Mojave is 10.14.6 if your Mac version is 10.14.5 or 10.14.4 then follow this article and update macOS Mojave on Virtualbox with few steps.
Table of Contents
New update on macOS Mojave 10.14.6
- Now you may get offline and online downloaded troubles within the My Magazines segment of Apple News+.
- The new edition will let you add all apps in the Apple News+ consisting of newspapers.
- If you get any downloaded mistakes in My Magazine in Apple News then you could restore it on History -> Clear -> Clear All.
- Now you could get troubles that forbid the advent of a new Boot Camp Partition on iMac and Mac Mini with Fusion Drive.
- Moreover, you could fix the problems whilst it causes a hang whilst restarting your PC.
- You can clear up graphics errors that occur even as waking your PC from sleep.
- Now Resolve a difficulty whilst you face watching video on full-screen on Mac Mini.
- macOS Mojave 10.14.6 improves file-sharing reliability over SMB.
Differences Between APFS and HFS
In Mac OS we have two different image files such as APFS and HFS, APFS stands for Apple File System Image and HFS stands for Hierarchical File System. as you are Windows users and you know in Windows we have 32bit and 64bit although both versions are separate from each other and none of them can support each other’s applications. like if you have Windows 32-bit then you can only install 32-bit software on your PC Or you have Windows 64-bit then you can only install 64-bit applications. So, APFS and HFS are the same as 32-bit and 64-bit.
The previous version of Mac OS which is macOS High Sierra can only work with the HFS image file and you can install only HFS file on Virtualbox and Vmware without any issues and errors. So, the new macOS version can support the APFS image file and you can install the APFS image file on the older version of macOS. therefore, we prefer to use the APFS file for installation purposes on Virtualbox although some time virtual machines can’t support the APFS file, therefore, you can use the HFS image file. the good news is that HFS is much faster than APFS and APFS is more functional than the HFS file. So, it’s your wish which image file you want to use for upgrading macOS Mojave to the latest version.
Update macOS Mojave on Virtualbox to the latest version
First of all, Open Virtualbox and launch macOS Mojave afterward go to Apple Logo -> About This Mac and check your current macOS Mojave version. if you have an older version of macOS Mojave then you might get the software update notification on system preferences. to upgrade macOS Mojave follow the below steps.
Step 1: Launch Virtualbox and select macOS Mojave VM then click the Power on a button to launch macOS Mojave.
Once you login to macOS Mojave then goes to Apple Logo -> System Preferences.
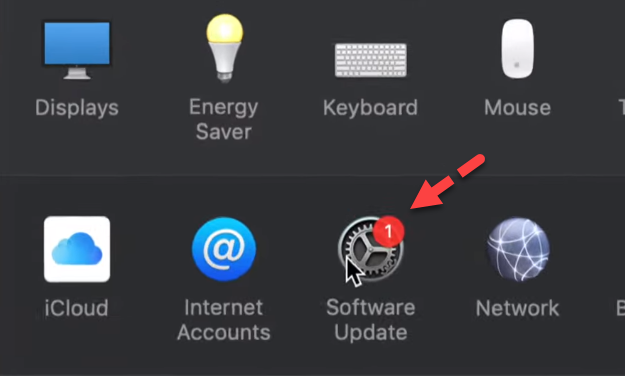
Step 3: Here, you can see several applications but you need to find Software Update and open it.

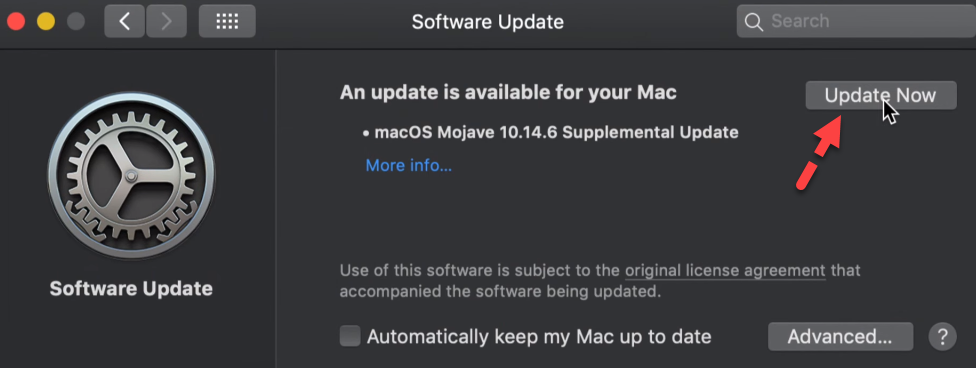
Step 4: Once you clicked on Software update then on the next page you will see a pop-up dialog box that checking for updates, wait for a while to find the latest update. While it finds the new update then you have to click the Update Now.

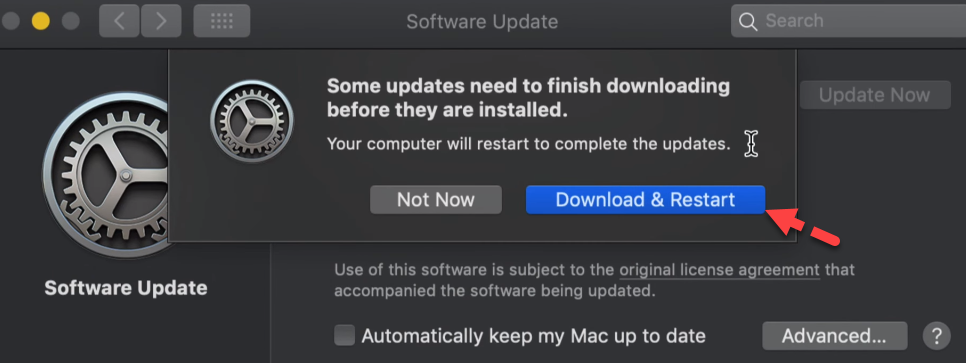
Step 5: Once you click the update now button then you will see the pop-up dialog box, here, click the Download and Restart button.

Step 6: Wait for a while to complete the process, as it depends on your internet connection if you have a fast internet connection then it will download updates within 5mins. 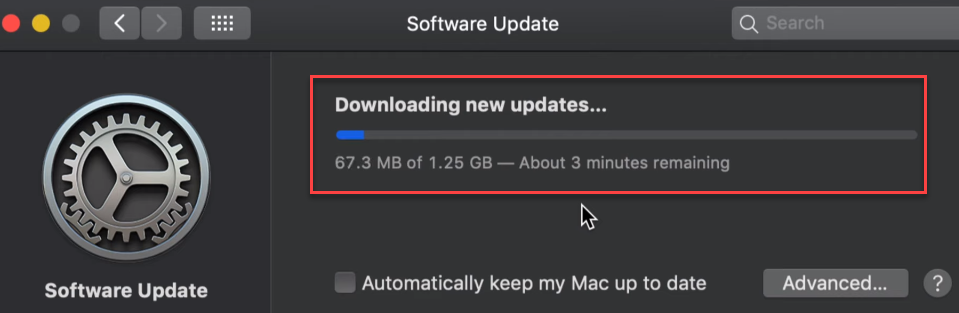

Downloading New Updates
Once your update downloaded then you have to restart your PC, therefore, restart your PC and come back. after that, power off virtual machine to add bootloader to VirtualBox.
Add New Bootloader to macOS Mojave
Now, you need to add bootloader to Virtualbox, for that, you will need to follow the below steps.
- Select the macOS Mojave virtual machine from the left side and click the Settings button from the top of the page. after that, tap to the Storage menu and click the Add Virtual Disk icon.
- After that, you will see a pop-up dialog box, here, click the Choose existing Disk. Then browse the bootloader file that you downloaded later.
- Once you add the bootloader image file then click Ok button.
- As you have added a bootloader image file then select macOS Mojave VM and click the power on button.
- When the macOS Mojave started then you will see the black and white screen full of coding. Here, click ESC key and type fs1:\update.nsh then hit Enter key.
Install New macOS Mojave Update in Virtualbox
When the booting Mac OS process starts. Then you have to wait for 35 to 40 minutes to complete the new update installation in Virtualbox. When you finish with installation then you need to restart your PC to complete the installation updates. Now, go to the apple logo and go to about this Mac and check the macOS Mojave version.
Read Next:
- How to Install macOS Mojave on Vmware on Windows
- How to Install macOS Cataline on Virtualbox on Windows
- Install macOS Catalina on Vmware on Windows
Bottom Line
This is about the new update of macOS Mojave. Therefore, when you are done then you can remove the bootloader image file from storage settings in Virtualbox. And keep the file for another update of macOS. Finally, you have the new update of macOS Mojave in Virtualbox and I hope you should not have any issues.
Make sure, whenever you get a software update notification. Then don’t waste your time and update your MacOS in a Virtual Machine to protect it from cyber threats.


2 comments