Thought every year, Apple Inc introduces a new version of the operating system for their computers. And macOS X El Capitan is a bit old. However, many people are still using El Capitan due to its requirements for low specifications machines. Moreover, a large number of people are using it on virtual machines. Therefore, let’s see if you are going to install the macOS X El Capitan on Virtualbox. So, how can you do it?
Let me say this first if you have installed another Mac operating system on Virtualbox like macOS Mojave or Catalina. The installation of El Capitan is also quite similar to that.
You need to execute some commands to install the image file of the operating system. Then you need to create a virtual machine for the OS. And finally, you can install it on the Virtualbox and use it.
However, if you are installing macOS X El Capitan for the first time, there is no reason to panic. We comprehensively explained the (A to Z) procedure on installing the macOS X El Capitan on Virtualbox.
Do, without wasting time; let’s get straight into it!
Table of Contents
How to install macOS X El Caption on Virtualbox?
Download and install Virtualbox:
The first thing is obviously Virtualbox. You should have downloaded and installed Virtualbox on your Windows PC or any other PC you have IF you have already downloaded and installed Virtualbox on your system. Then you can skip this section.
However, if you have not installed it yet, we have already covered that section in another extensive article. We will paste the link of the article on how you can download and install VirtualBox on your Computer. Follow the instruction, as stated in the section. And you can have the Virtualbox on your system successfully.


Download macOS X El Capitan virtual image file:
As you have successfully installed Virtualbox on your system. Now, it is time to find a macOS El Capitan image file for Virtualbox.
The macOS image file is not available officially by Apple Inc. Those who require an image file. That needs to convert the ISO file into an image file. And this procedure has specific steps to execute.
However, we have already converted it into an image file. And have stored safe and secure. You do not need to execute those lengthy steps. So, we have provided the data in a Google drive. Folder. You can visit the folder below and download the macOS El Capitan image file easily.
Then you just need to extract the file. And it is ready to be used in Virtualbox software.
Create a macOS El Caption virtual machine:
Till here, you have installed Virtualbox. And you have also downloaded and extracted the macOS El Capitan image file.
So, in this step, you need to create a virtual machine before installation. And finally, after this process, you will reach the final stage and install macOS X El Capitan on Virtualbox on Windows PC.
- Open the Virtualbox software, and hit on New to start to create a new virtual machine.
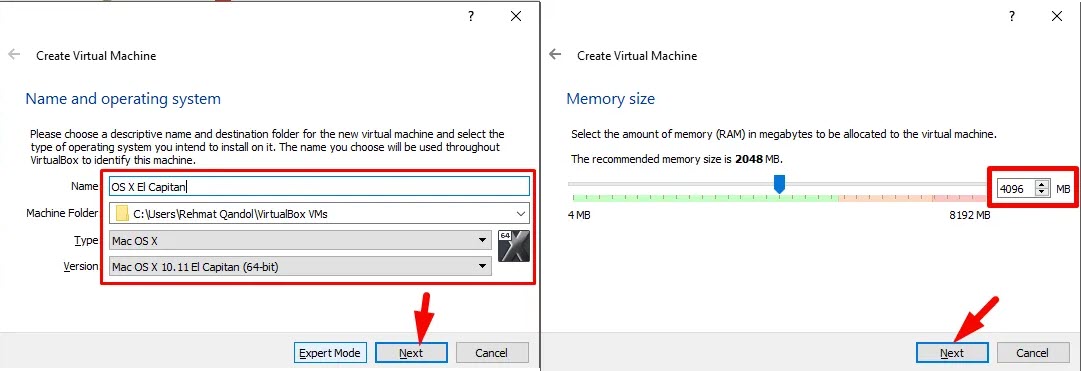
- Afterward, give a name to the Virtual machine as you are installing macOS El Capitan. So, put the title. Moreover, the type and version will be selected automatically if it didn’t fill in the blanks manually. And then hit the Proceed.
- At this step, allocate an amount of RAM for the virtual machine that you consider standard. Point to be noted that the minimum amount of RAM for macOS El Capitan required on Virtualbox is 3MB. However, we recommend allocating 8GB if you have a significant amount of RAM. And hit Next to proceed.
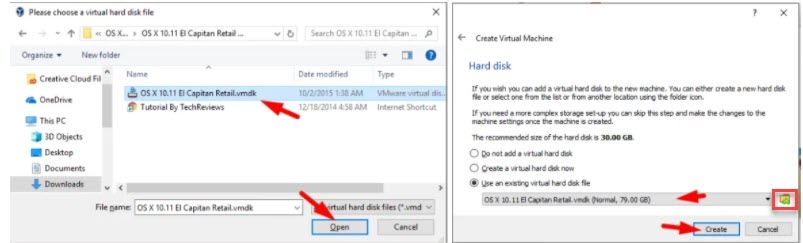
- In the following window. You need to allocate the amount of storage to the virtual machine. Keep your focus on this step. You can choose from three options. Whether, don’t create a hard disk, create a new hard drive, or select the existing virtual hard disk.
- As we already have a virtual hard disk from another virtual machine. So, we select this option. However, we recommend you to create a new hard drive. The step of the creation of a new hard disk is not a big deal. You just need to allocate the amount of storage. Then select the type of room. We believe that you are as smart as to perform this step on your own.
- Therefore, once you allocate the amount of storage, select the file of macOS El Capitan. Bear in mind that the step depicted in the picture could be different than yours because we have directly chosen the file from the prior window.


So, now the creation of a virtual machine is done. However, you should edit some more additional settings for the new Virtualbox.
Alter settings for the new virtual machine:
- Now, go to the home screen of Virtualbox. And select the macOS El Capitan and enter the settings area.
- Then General > System > Motherboard. Uncheck the floppy disk box. Then, in the Processor menu, Select the amount of CPU to allocate for macOS El Capitan. We recommend you select four cores of CPU if you have significant cores.
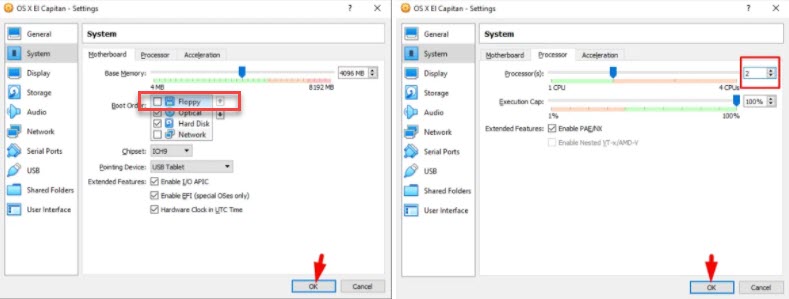
- Afterward, in the Display option from the left panel. Select 128MB for Video memory. Moreover, from the USB panel. Select the USB 3 Option and hit OK.

Add command prompt code:
This step might feel complicated if you have not used the command prompt before. But don’t worry. Just follow the instruction given.
- First of all, copy the commands from below in the notePad. And change the “your VM name” with “OS X El Capitan.”
- Then type cmd in the search box. And the command prompt will open. Now, copy each line of command and paste it in the command prompt. As well as hit Enter. Once you paste the entire command, the command prompt will close.
- Moreover, remember that we have provided two types of commands for the Command prompt. One is for Virtualbox 4.0. And the other is 5.0. Remember not to run the wrong commands.
For Virtualbox version 4.0:
- cd “C:\Program Files\Oracle\VirtualBox\”
- VBoxManage.exe modifyvm “Your VM Name” –-cpuidset 00000001 000306a9 04100800 7fbae3ff bfebfbff
- VBoxManage setextradata “Your VM Name” “VBoxInternal/Devices/efi/0/Config/DmiSystemProduct” “MacBookPro11,3”
- VBoxManage setextradata “Your VM Name” “VBoxInternal/Devices/efi/0/Config/DmiSystemVersion” “1.0”
- VBoxManage setextradata “Your VM Name” “VBoxInternal/Devices/efi/0/Config/DmiBoardProduct” “Iloveapple”
- VBoxManage setextradata “Your VM Name” “VBoxInternal/Devices/smc/0/Config/DeviceKey” “ourhardworkbythesewordsguardedpleasedontsteal(c)AppleComputerInc”
- VBoxManage setextradata “Your VM Name” “VBoxInternal/Devices/smc/0/Config/GetKeyFromRealSMC” 1
For Virtualbox version 5.0:
- cd “C:\Program Files\Oracle\VirtualBox\”
- VBoxManage.exe modifyvm “Your VM Name” –-cpuidset 00000001 000106e5 00100800 0098e3fd bfebfbff
- VBoxManage setextradata “Your VM Name” “VBoxInternal/Devices/efi/0/Config/DmiSystemProduct” “iMac11,3”
- VBoxManage setextradata “Your VM Name” “VBoxInternal/Devices/efi/0/Config/DmiSystemVersion” “1.0”
- VBoxManage setextradata “Your VM Name” “VBoxInternal/Devices/efi/0/Config/DmiBoardProduct” “Iloveapple”
- VBoxManage setextradata “Your VM Name” “VBoxInternal/Devices/smc/0/Config/DeviceKey” “ourhardworkbythesewordsguardedpleasedontsteal(c)AppleComputerInc”
- VBoxManage setextradata “Your VM Name” “VBoxInternal/Devices/smc/0/Config/GetKeyFromRealSMC” 1


Once you are done! You can step into the final stage.
Install macOS X El Capitan on Virtualbox:
The final step is quite straightforward. The installation on Virtualbox is quite similar to the installation of a whole Mac system. It is recommended to restart your order first.
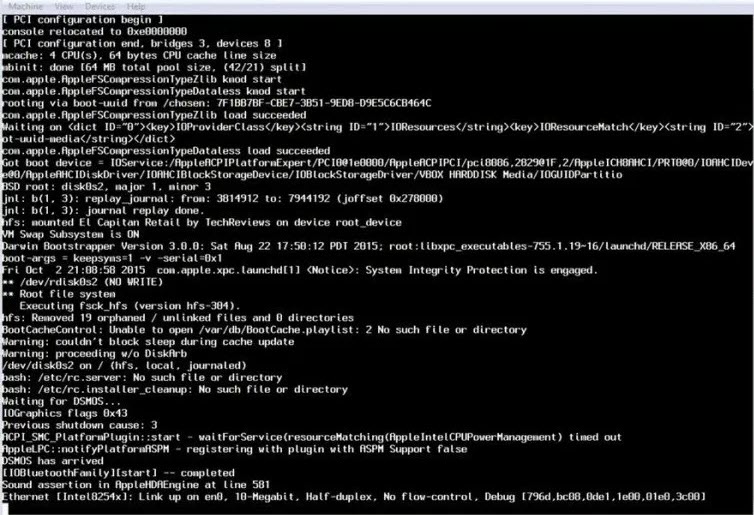
- Open the Virtualbox, Select the macOS X El Capitan, and hit the start button.
- In the new window, you will see some sort of code being implemented. So wait for a while. Then select your language and proceed.
- Select your keyboard type and proceed.
- Then, select don’t transfer information. Because we haven’t any data. And press Continue.
- In the other window, don’t allow location. And proceed.
- Then, you can create an Apple ID if you have not. Or skip this step.
- Moreover, accept the terms and conditions, select time, create a computer account. And So on.

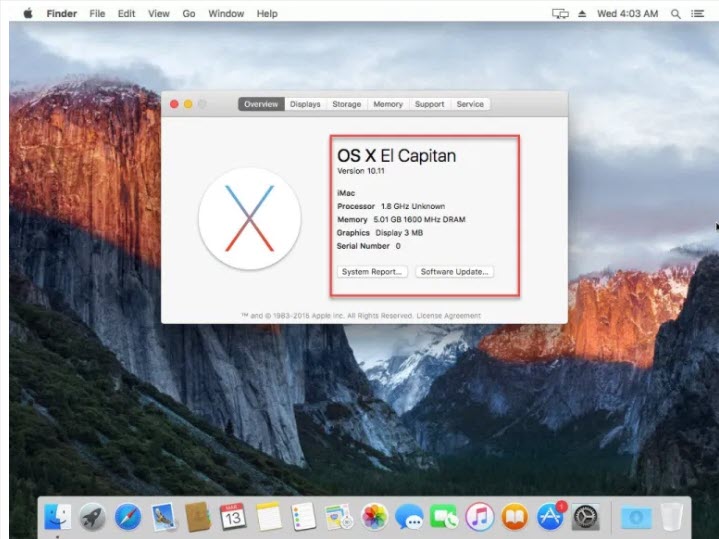
When you complete this process, you can have macOS X El Capitan running on your Windows PC.

Next up in Virtual machines:
- How to install VMware Workstation on Windows 10 PC?
- How to install macOS high sierra on Virtualbox on Windows?
- Download and install macOS unlocker for VMware workstation.
- How to install Zorin OS on Virtualbox? (Complete Guide).
- How to install Ubuntu on Virtualbox? (Complete Guide).
Conclusion:
You can successfully install macOS X El Capitan on Virtualbox on Windows PC following the step by step procedure. Moreover, keep in your focus during the execution of commands.
To conclude, we would like to say that DO FOLLOW US for more knowledgeable upto content.


1 comment