The screenshot is one of the most useful features of digital products. But the matter is how to take a screenshot on any PC? Well, there are various methods with the help of which you can easily make a screenshot of your desktop or laptop.
One of the oldest ways to take a screenshot on any computer is by pressing the Print Screen button. But this is not the only way to take screenshots. There are multiple ways to make a screenshot of your PC’s screen, which we are going to reveal in this article ahead.
It is not essential that all the options must work with your associated PC. Every method works differently with different keyboards and operating systems.
Most importantly, it depends on the type of keyboard you are using with your laptop or computer. On the consoles, the Print Screen button is added as a primary button or secondary. For instance, on my laptop, I cannot take a screenshot of my laptop’s screenshot, only pressing the Print Screen button. On my laptop, I need to take a screenshot by pressing Fn+Prt Sc.
Likewise, on your laptop, it may work differently. Anyways, no worries! Below are going to dig in every possible method to take a screenshot on your PC.
Table of Contents
How to Take Screenshot on Windows:
There are multiple ways to take a screenshot on windows. Below we are going to put light on some of the easiest and latest techniques to take a screenshot on Windows computer.
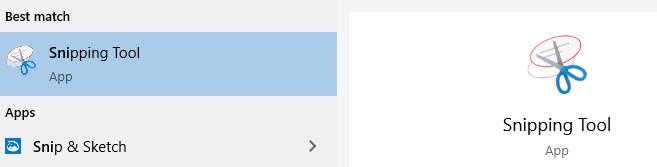
Snip and Sketch:
The snipping tool is old now, the new snip and sketch tool is the latest tool to take a screenshot of any part of your Windows desktop or laptop. What you need to do is just go to
- Search Bar and type Snip and Sketch.
- And then take the screenshot of any part of your screen you want.
Moreover, you can adit the screenshot too in the sketch app. This method works on all the laptops which are running on Windows OS.

Print Screen:
You may surely have seen Print Screen or Prt Sc button on your keyboard. This is the simplest way to take the screenshot of your PC. You just need to press this button while you work, and the screenshot is automatically copied on your clipboard. It is not saved on your device.
To save the screenshot, you need to open any app like Word paint and press the Ctrl V to paste the picture of the screen. And that finally, you can save it on your device.
However, this button does not work alone on many devices. You need to press it along with any other pin with which it has been designed on your keyboard. Therefore, ahead we will see all the options you can try with the Print Screen button.
Fn + Prt Sc:
This option is useful mostly for laptop users, especially hp laptops. If you are using Windows on hp laptop, then this option is for you. You need to press these buttons mutually to take the screenshot of your laptop.
Again this does not save the picture; instead, you have to paste the image on any page in any app. Then you can save the screenshot.
Windows + Shift + S:
The combination of these buttons works on Windows 10 PC. When you press these buttons, the screen of your computer is dimmed. Then move the crosser to the area you want to take the screenshot of.
Again you need to open any photo editing app to paste the picture and save it on your device.
Windows + G:
Windows + G is another option you can use to take the screenshot on your Windows OS. With this option, you can do more. You can also record your screen with this keys combination.
How to take a screenshot on macOS:
If you are using a mac, you will require to press different keys to take a screenshot of your Mac PC. Below will we will show you some of the straight forward and easiest ways to make the screenshot of the entire screen or any part of your screen on mac PC.
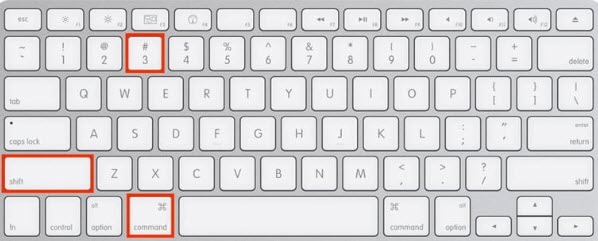
Command+Shift+3:
Pressing these three keys simultaneously enables you to take the screenshot of the entire mac PC. When you press these keys, the screenshot will be taken and copied to the clipboard. It might also be saved automatically on your device, depending on the version of OS.
Or Then, you need to paste the picture in any app and save it on your device.

Command+Shift+4:
The difference between the first and this method is that by pressing these keys, you can take the screenshot of any section of your screen, while the first option is used to make the screenshot of the entire screen.
Once you press these keys simultaneously and then let it go, The screenshot automatically is saved on your device.
Editors Recommendations:
- How to show hidden files on Mac PC?
- How to upgrade Windows 7,8 to Windows 10?
- Top Three ways to run Windows on macOS.
- How to download Docker for Mac? (Complete Guide).
- Should you upgrade macOS Mojave to macOS Catalina?
Bottom Line:
It was all about taking a screenshot on any PC, including Windows and macOS. In this article, we brought all the possible methods which you can use to take a screenshot on your device.
Moreover, all the methods may not work with your device, but some will definitely because it depends on the version of the OS and keyboard you are using. To conclude, we would like to say that we do not forget to follow us for more info and knowledge regarding technology. And also, do not forget to read our editor’s recommendations.

