Are you looking to create a bootable USB for macOS Mojave on Windows? If yes. then, in this article, I am going to show you the best way to create a macOS Mojave USB Installer. However, it announced the well-known operating system macOS Mojave on World Wide Developers Conference (WWDC) 2018. After that, Apple released macOS Mojave public beta to the public in September 2018. People love MacOS Mojave because of its handy features although Apple has included many new and useful features to macOS Mojave. the handiest feature is called Dark Mode, this is the best feature for those users who spend a long time using a computer and they can select a dark mode or change light mode to dark mode from system preferences.
macOS Mojave is ready to install on Virtual Machines or Mac computer, However, if you want to install macOS Mojave on Virtual Machines like Virtualbox and Vmware then creating macOS Mojave USB drive is more reliable to install macOS Mojave. Although you can install macOS Mojave on a virtual Machine without a bootable USB through a Virtual Machine image file. It means, downloads macOS Mojave dmg file and installs on Virtualbox or Vmware. Moreover, if you are curious to install macOS Mojave on Macbook, Macintosh, or Hackintosh PC then it is better to create macOS Mojave bootable USB installer, after that, install macOS Mojave on your PC Via bootable USB.
There are several ways to create a bootable USB for macOS Mojave on Windows, although you can do it with third-party software like TransMac and Unibeast. Besides that, you can create MacOS Mojave USB Drive Installer on macOS Mojave itself using Virtualbox or VMware. But, I am going to show you creating a bootable USB on TransMac software on Windows 10. Therefore, take your USB and make ready TransMac on Windows and follow me.
Table of Contents
Create A Bootable USB for macOS Mojave on Windows
Before creating a macOS Mojave USB drive installer, you will need to make ready some requirements on your computer. to create a macOS Mojave USB installer, you need to download the macOS Mojave image file. Once the download is done then extract the compressed macOS Mojave file with WinRAR or 7ZIP software. Once, you are done with extracting macOS Mojave then download and install TransMac software on your Windows 10.
What is TransMac Software
TransMac is Acute device in Windows working system which can reproduction and paste and manage the documents on Windows for Apple or Mac Systems, Including Mac-formatted USB drives, SSD force, Hard drives, and any kind of Storage devices, besides, it can burn VMDK and dmg documents of MacOS Catalina, macOS Mojave, macOS High Sierra, macOS X El Capitan, macOS Sierra, macOS Yosemite, and every other operating system of macOS, there may be awful information that TransMac is not unfastened whether or not you should too utilizing this or use for 15 days Trail.
Some TransMac Features:
- Apple File System (APFS) quantity study guide.
- Open Mac APFS/HFS/HFS+ format disk drives, flash drives, CD/DVD/Blu-ray media, HD floppies, dmg, dmg part, sparse bundle, and sparse image files.
- Copy documents to Mac HFS+ disks and dmg pix.
- Format as HFS+ for Mac.
- Save and restore pix of disks and flash drives.
- Create, compress, amplify and cut up dmg documents.
- Built-in burner capability to burn ISO and dmg files directly to CD/DVD/Blu-Ray.
- Read Mac multisession and hybrid CDs.
- View partition format.
Required Files
- 16GB up to 32GB USB Drive
- TransMac Software
- macOS Mojave 10.14 DMG File
Install TransMac on Windows 10
Once, you download TransMac software on your windows, then install it on your PC with the below steps. Installing TransMac on Windows 10 is quite simple, therefore, I will guide you without a screenshot.
- Go to the Download folder and find the TransMac setup file.
- Double-click the setup file to start the installation wizard.
- On the first screen, you will see the welcome page, therefore, click the Next button.
- Now, it will ask you to agree on the license and agreement by clicking on the I Accept The Agreement button and click the Next.
- on the next page, select the location for TransMac where you want to install it.
- Then, you will be asked to create a shortcut icon on the Start Menu and desktop screen.
- Nothing is required to do simply click the Next button.
- Now, you are ready to install TransMac on your Windows 10, therefore, click the Install button and wait for a while to complete the installation.
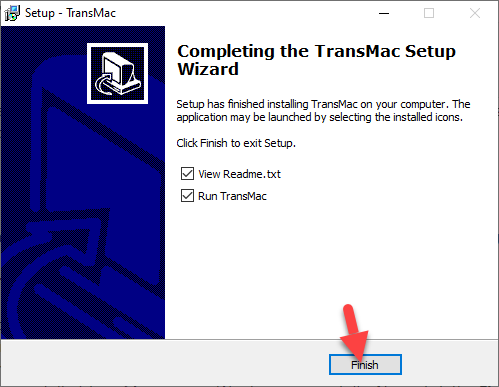
- Congratulations, you have installed TransMac on your Windows successfully. Now, click the Finish button.

Create macOS Mojave USB Installer
Now, you have TransMac on your Windows and you download the macOS Mojave image file. Therefore, pick up 16GB up to 32GB USB drive and connect it to your computer. After that, follow the below instructions.
Step 1: Now you are ready to create a bootable USB for macOS Mojave on Windows. as you installed TransMac on Windows, therefore, run TransMac as administrator and follow the below steps.
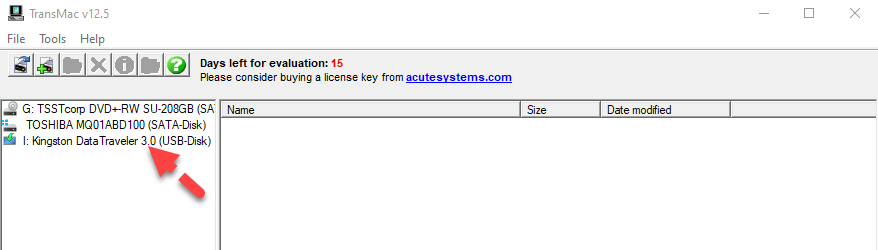
Step 2:Once you run TransMac as administrator then you will see a list of drivers on the left side of the page. here, select the USB drive you want to create a bootable for macOS Mojave. then, right-click on the drive and click the Restore with Disk Image.

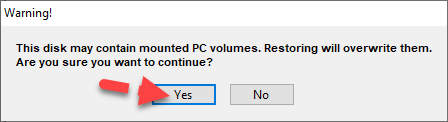
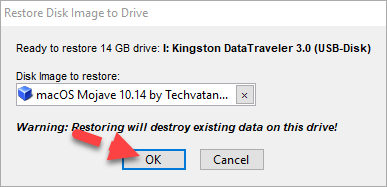
Step 3: While you restore the drive then TransMac gives you the warning. So, read the description and click the Yes.

Step 4: Now, to create a macOS Mojave USB installer, select the macOS Mojave image file you downloaded later. to do that, click on the blank box.

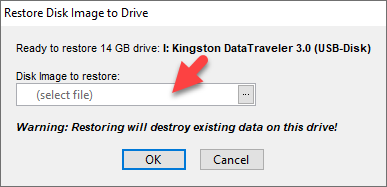
Step 5: Now, Browse the macOS Mojave VMDK file or DMG file to create a bootable USB. after that, click the OK button.
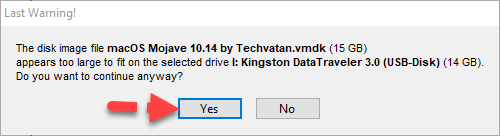
Step 6: As my USB drive size is 14GB and the macOS Mojave file size is 15GB, therefore, it’s telling me to continue anyway or no. However, I prefer you to connect 16GB USB drive and create a bootable USB. Although, it will create a bootable USB for me. Therefore, Simply, click the Yes button.

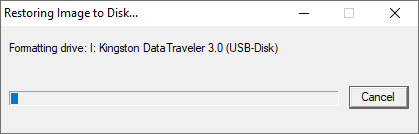
Step 7: At the last step, you have to be patient because it will take some time to format your USB and copy the macOS Mojave Image file to your USB Drive. It will copy the macOS Mojave dmg file Automatically.

Related Articles:
- How to Install macOS Mojave on Virtualbox on Windows
- How to Fix Mouse & Keyboard Stuck on Virtualbox
- Fix macOS Mojave Screen Resolution on Virtualbox
- Reset Forgotten Password of macOS Mojave
Bottom Line
This method will guide you to create a bootable USB for macOS Mojave and I hope you get all the descriptions and methods. Moreover, If you get any kind of confusion or question then please feel free to ask me in the comment box.

