Have you installed macOS Mojave 10.14 on Virtualbox or Vmware and you create a new computer account including password? However, installing macOS Mojave on Mackintosh or upgrading to the latest version of macOS Mojave. Snd you have set a password to protect your computer and files from a stranger. Hands down, every user prefers to set a password to preserve their Operating system or Computer. Because macOS Mojave is the best Operating system so far and no one wants others to bring changes without their permission. So, after a few days, you want to launch your Mac computer. And you are trying to login to your macOS Mojave. But unfortunately, you forget your password.
However, macOS Mojave 10.14 is the latest version of the Mac Operating system and Apple company announced macOS Mojave on World Wide Developers Conference 2018. later on, Apple released the macOS Mojave in the same year to the public including tons of features and functions. Although Apple has announced and released the new Operating system called macOS Catalina 10.15. Moreover, Apple has added many new features to the macOS Catalina 10.15. Needless to say, I prefer you to reset your forgotten password of macOS Mojave. And in case you want to give a shot to MacOS Catalina then upgrade macOS Mojave to macOS Catalina.
Related Articles:
- How to Fix macOS Mojave 10.14 Screen Resolution on Virtualbox
- How to Fix Mouse & Keyboard Stuck on macOS Mojave on Virtualbox
Table of Contents
Reset Forgotten Password of macOS Mojave on Virtualbox
Here, I will guide you on how you can reset your password on Virtualbox. However, most of the users are running macOS Mojave on Virtualbox or Vmware because they can’t afford Mac computer that’s why they prefer to use virtualization software. in case, you installed macOS Mojave on Virtualbox or Vmware then this guide is for you.
To get recovery mode on the virtual machines is different from the Mackintosh computer. Virtualization software like Virtualbox and Vmware. You have to insert the MacOS Mojave recovery mode image on a virtual machine. Then you can get recovery mode on Virtualbox or Vmware. Otherwise, there is no way to get recovery mode. Therefore, follow the below steps to insert the recovery mode image on a virtual machine.
Get Into Recovery Mode of macOS Mojave on Virtualbox
This tool helps you the most even it will help you to reset your password, to restore your data, or you want to have a clean installation. So recovery mode provides several options where it can solve your current problems. However, you are Mac user and you know pretty much about it but you might don’t know that a macOS virtual machine works the very same of actual macOS so far. there is no difference between the physical Mac and the Mac on a virtual machine which includes installing, resetting, recovering and working with them virtually. So, to get recovery mode on a virtual machine insert the recovery mode image file on a virtual machine.
- macOS Mojave recovery mode image
As I told you, you have to insert a recovery mode image file on virtual machine settings, therefore, to boot up recovery mode download its file from google drive and this file will work for both Virtualbox and Vmware. While downloading the file you might see download limit error but don’t worry you can fix google drive download limit error easily.
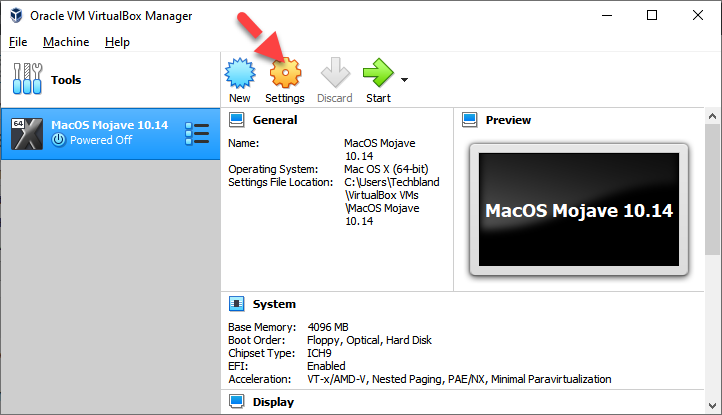
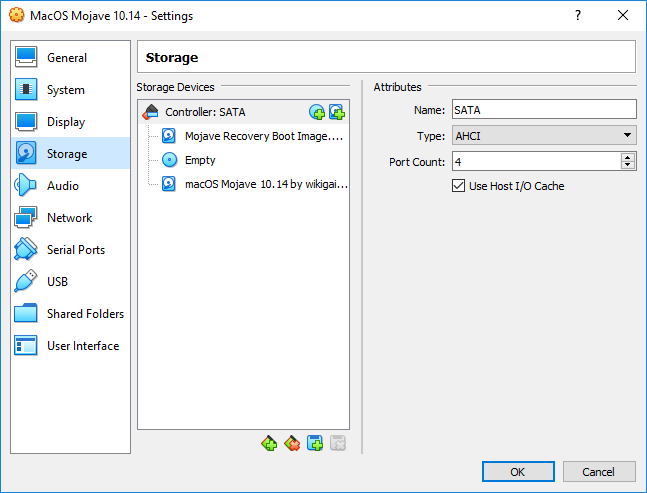
Step 1: Firstly, launch Virtualbox and select macOS Mojave virtual machine from the left side and click the Settings button from the top of the window.

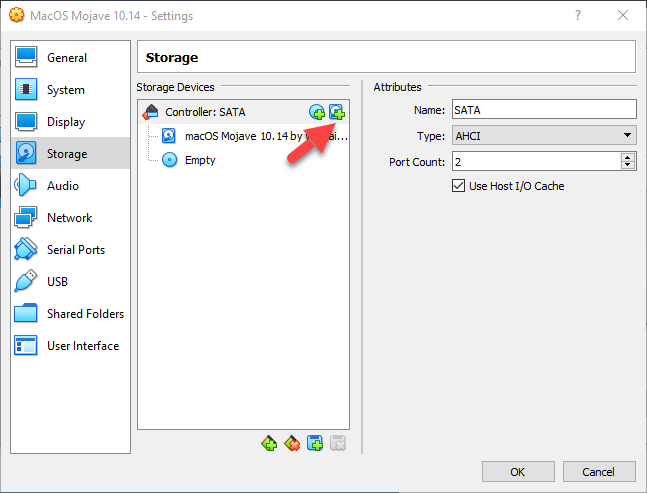
Step 2: Here, go to Storage and click the small CD icon to insert the recovery mode image file.

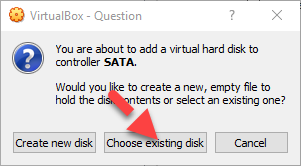
Step 3: Afterward, you will see the pop-up menu and here click the Choose existing disk.

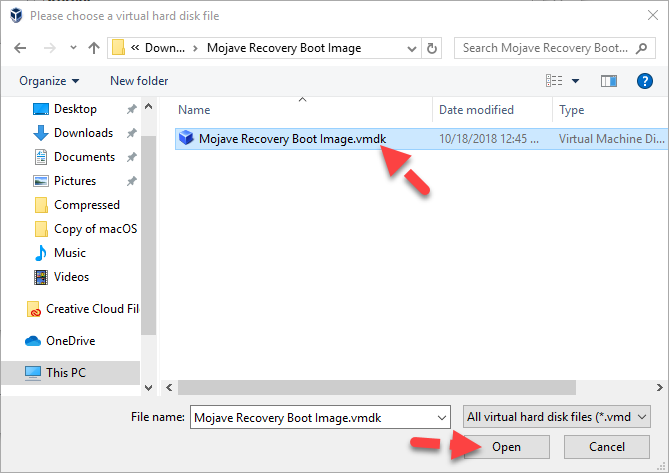
Step 4: Once you click the Choose existing disk, then you will see a new menu will pop up. here, click the Add button and select the image file you downloaded later then click the Open button. afterward, click the Choose button.

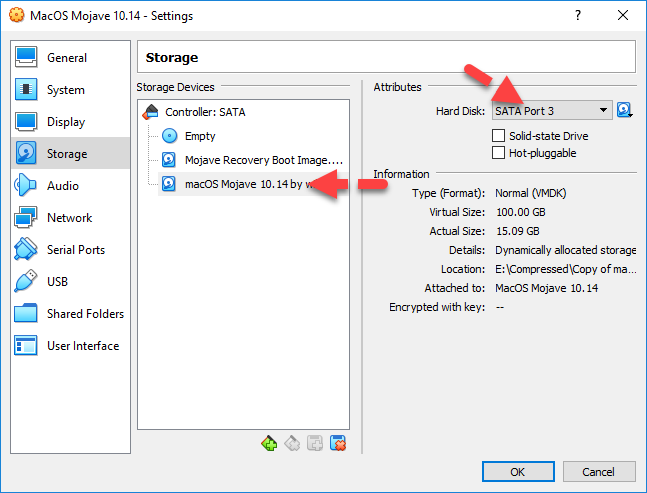
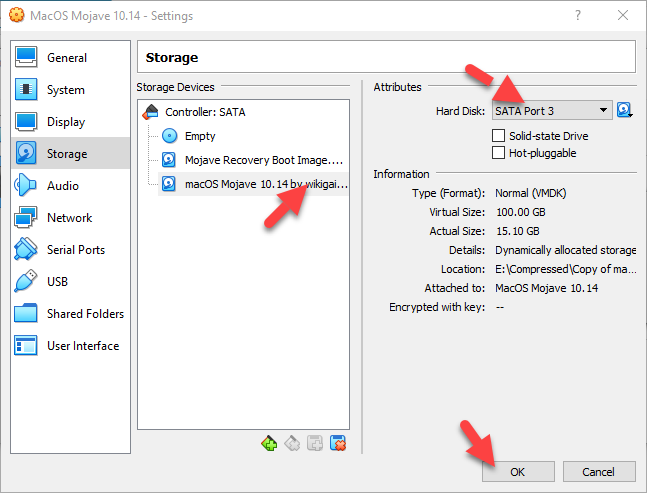
Step 5: After that, select MacOS Mojave image disk and change the hard disk to SATA Port 2 or 3. then you will see the macOS Mojave disk file will move under the recovery mode image file.
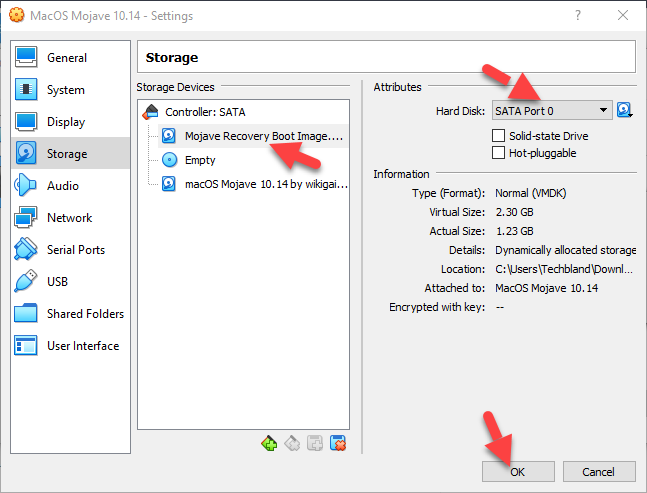
Step 6: Then, select the Mojave Recovery Boot Image file and change a hard disk to SATA port 0 and click the Ok button.
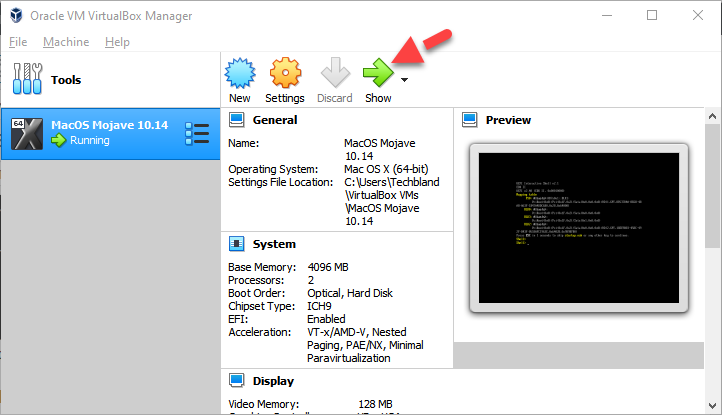
Step 7: Once you are done with all settings then start your macOS Mojave virtual machine. therefore, click the Start button form the top of the page.
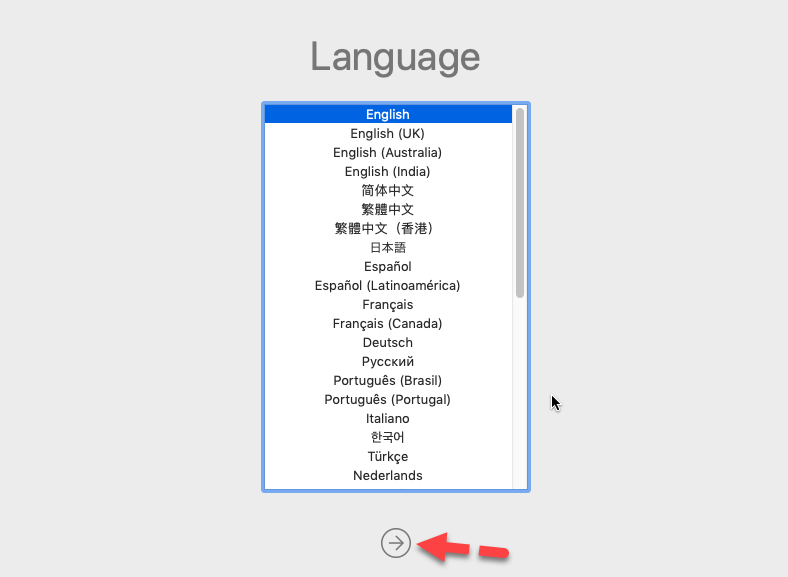
Step 8: While you run the macOS Mojave virtual machine, then it will ask you to select your Language. Therefore, select your language and click the Continue button.

Reset Forgotten Password of macOS Mojave with Recovery Mode
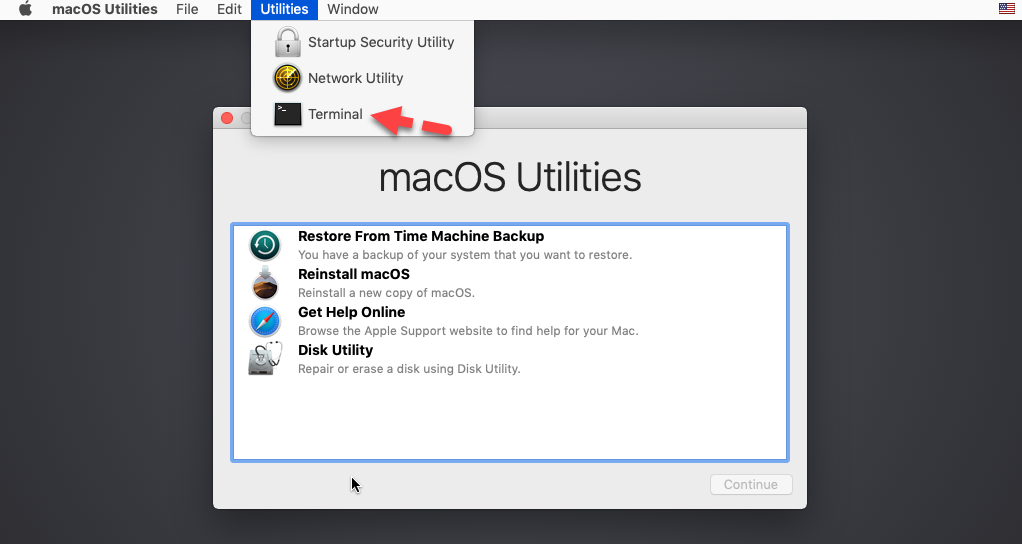
Step 9: Once you are in recovery mode, then go to Utilities and click the Terminal.

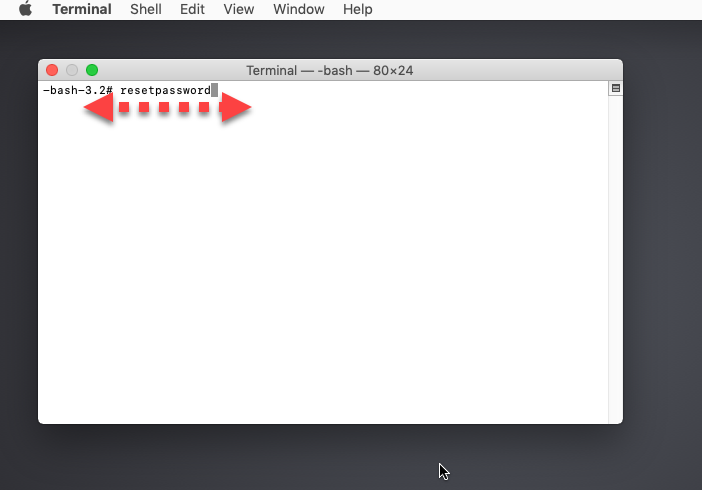
Step 10: In Terminal, type reset password without any space and press Enter.

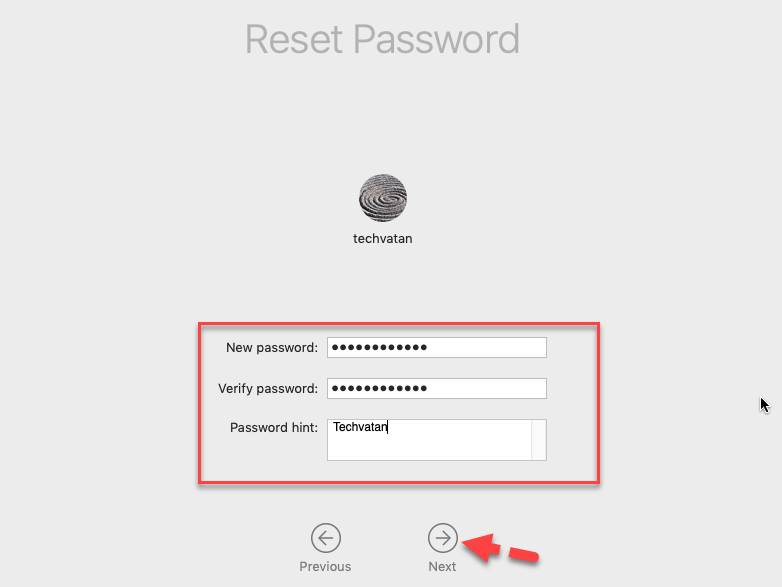
Step 11: Here, set a new password for macOS Mojave without using the old password. Therefore, type a New Password, Verify Password and give Password Hint. after that, click the Next button.

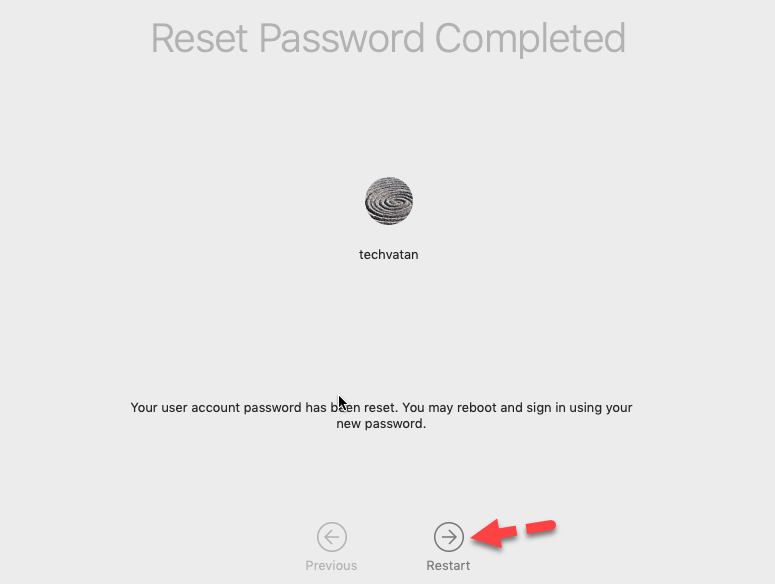
Step 12: Congratulations: your password has been reset successfully. therefore, restart your computer.

Step 13: After restarting your PC then it will ask you to type your password. Therefore, log in with your new password.

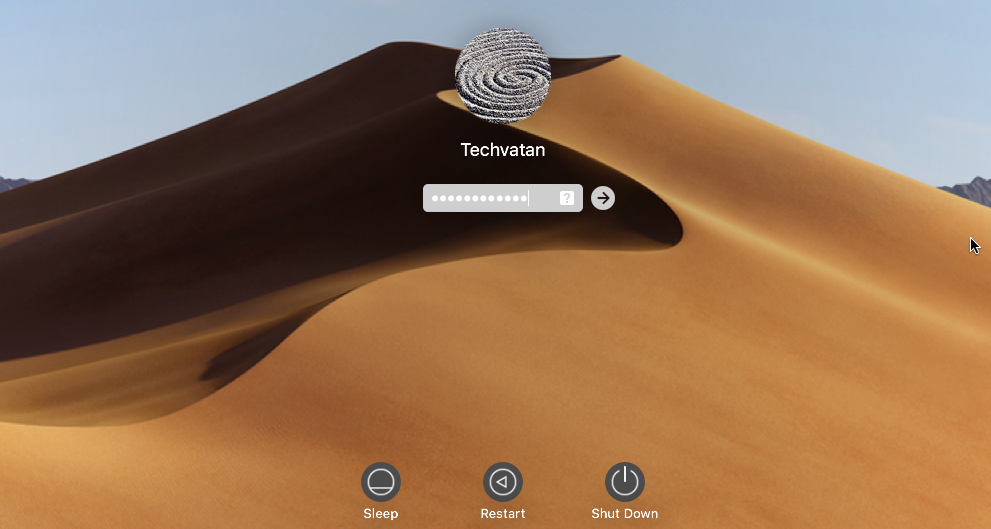
Congratulations: you have reset your forgotten password and you logged in with your new password. Now take a note of your new password to not forget in the future. In case you forget your password again, then follow this method and it will help you.

Get Back to the Normal Mode of macOS Mojave
Whenever you restart your computer then it will get you on the recovery mode. Although you have changed and reset your password that’s why you don’t need recovery mode anymore. Therefore, you have to go back to the normal mode of macOS Mojave. to do that follow the below instructions.
Step 1: Open Virtualbox and select Virtual Machine and click the Settings button.
Step 2: Now, go to Storage and change both hard disk SATA port.
Step 3: So, select Mojave recovery boot image and change a hard disk from SATA port 0 to SATA port 2.

Step 4: After that, select the macOS Mojave image file and change a hard disk from SATA port 2/3 to SATA port 0. then click the OK button.
You are done with virtual machine settings. Now run macOS Mojave and you will see the login page, not recovery mode.
Bottom Line
the above method will work for macOS Catalina, macOS Mojave, macOS High Sierra, Mac OS El Capitan, or any Mac operating system. If you are using any Mac operating system out of macOS Mojave. Then you can apply this method. The method is the best and it works 100%, therefore, try it carefully and you will solve your problem.
If our article was helpful to you then please give your feedback. And if you have any questions or you know any other methods. Then please let us know and comment in the box.


we will try to shortly make a solution for that, dear.