Hello, In this article, I will show you How to Fix macOS Mojave Screen resolution on Vmware on Windows. However, macOS Mojave 10.14 is the best operating system of Apple for Macbook, Mackintosh, and other virtual machines. Apple has announced macOS Mojave on WWDC 2018 and released for public in September 2018 including tons of features such as iOS apps on Mac, Dynamic Wallpaper, Desktop Stacks, the new app store design, dark mode theme, and many other handy features.
So, you might have tested macOS Mojave on Macbook, Mackintosh, or virtual machines like Vmware and Virtualbox. installing Mac OS on virtualization software is the best way before installing on the main computer because the newly released operating system has some bugs and errors, therefore, always install any new OS on a virtual machine before the main computer.
So, once you installed macOS Mojave on Vmware or you have installed macOS Mojave on Virtualbox then you might notice some errors on Vmware and Virtualbox. although, there are many bugs and one of them is the screen resolution that every user will face after installing any guest OS on VMWare and Virtualbox.
How to Fix macOS Mojave Screen Resolution on VMware on Windows?
The best solution to fix some bugs on macOS Mojave on Vmware is to install Vmware tools after you installed macOS Mojave on Vmware on Windows. Vmware tools enable many features and functions of Vmware workstation on macOS Mojave and you will get better performance and quality.
Step 1: Go to Start Menu and search for Vmware Workstation and open it.
Step 2: Once you launch Vmware Workstation then select macOS Mojave VM and click the Power button to run macOS Mojave Virtual machine.


Step 3: Now, type your admin password and press Enter.

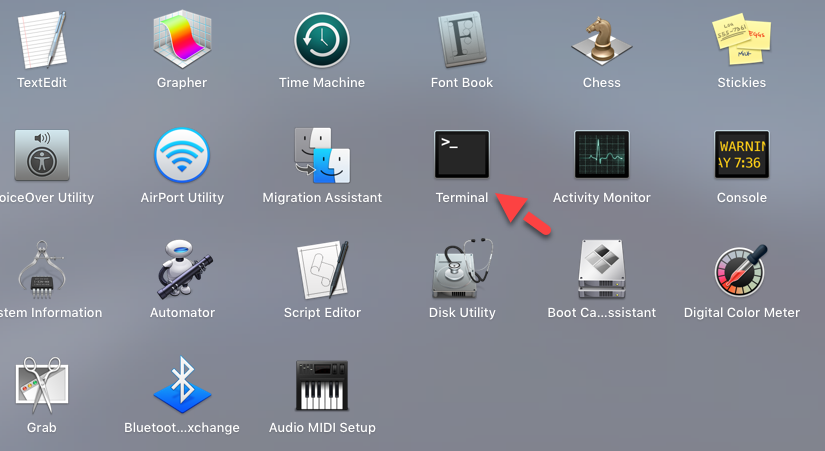
Step 4: Now, you will need to paste one line of code to the terminal, therefore, you can open terminal from Dock -> Launchpad -> Other -> Terminal or open Spotlight and type Terminal then the first option will be the terminal then open it.

Step 5: Once you open the terminal then open Notepad from the Start menu and copy the below code and paste it on the notepad.
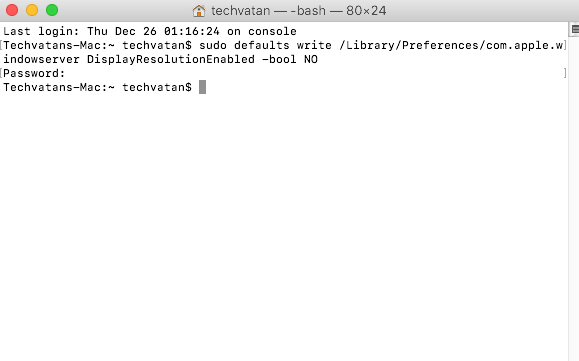
sudo defaults write /Library/Preferences/com.apple.windowserver DisplayResolutionEnabled -bool NO
Step 6: Once you paste the code on a notepad then copy the code from notepad. And go to terminal and paste it there then hit Enter key. Afterward, you will be asked to enter your admin password, therefore, type the password correctly and hit enter.

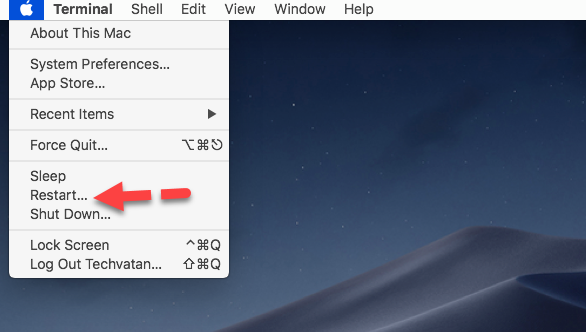
Step 7: Now, close the terminal windows and restart your system. To restart your system go to Apple Logo and click the restart button.

Once you restart your system then login with your admin password. And you will see the screen resolution has fixed and everything is displayed fine.
Related Articles:
- How to Fix macOS Catalina Screen Resolution on Virtualbox
- How to Fix Mouse & Keyboard Stuck on macOS Mojave
- Install macOS Catalina on Vmware on Windows
- Install macOS Catalina on Virtualbox on Windows
Bottom Line
This is the main problem every user will face after completing the macOS Mojave installation on Vmware on Windows. Although they don’t know how to fix that. therefore, in this article. You learn the best method to fix the screen resolution on macOS Mojave.
Moreover, if you have any question then please feel free to ask me in the comment box.

